Next.js 13: Interpreting and Displaying Markdown Text
Date:

1. Introduction
Next.js, a popular React framework for building server-side rendered (SSR) and static websites, introduces @next/mdx in its latest version, Next.js 13, for interpreting and displaying Markdown text. Markdown is a lightweight markup language known for its simplicity and readability. In this article, we will explore how to integrate and render Markdown content using the @next/mdx library.
2. Why Markdown?
Markdown is widely used by content creators, developers, and writers due to its intuitive syntax and ease of use. By combining plain text with simple markup, Markdown enables the creation of structured documentation, blog posts, and other textual content without the need for complex formatting.
The input:
After interpreting, the output is:
MDX is a superset of markdown that lets you write JSX directly in your markdown files. It is a powerful way to add dynamic interactivity and embed React components within your content.
3. Markdown Support with @next/mdx
Next.js 13 introduces @next/mdx, a comprehensive solution for working with Markdown in a Next.js project. It seamlessly integrates Markdown rendering into your application using a combination of Next.js's serverless functions and the MDX (Markdown + JSX) syntax.
4. Install the required packages
To begin, ensure that you have Next.js 13 installed. Then, follow these steps to get started with @next/mdx.
5. Create mdx-components.tsx
According to Next.js official doc: MDX and MDX support width appDir enabled:
Good to know:
mdx-components.tsxis required to use MDX with App Router and will not work without it.
However, it is still working properly without mdx-components.tsx in the Demo Repo. Probably there are minor releases that have removed the dependency of it.
6. Modify next.config.js
To use MDX, need to update the Next.js config file next.config.js:
7. Render Markdown/MDX
Now we can render component with Markdown/MDX syntax. Add a file src/app/privacy/privacy.mdx:
Add src/app/privacy/page.tsx to render the MDX:
Run yarn dev and visit http://localhost:3000/privacy, you should be able to see the page like:

Inspect the page and you will find the rendered html to be like:
8. Component in MDX
MDX allows us to render a React component inside. Create a testing component src/app/privacy/button.tsx:
Then we can import and render it in the .mdx file, the file will be:
The page now looks:

9. Remark plugins
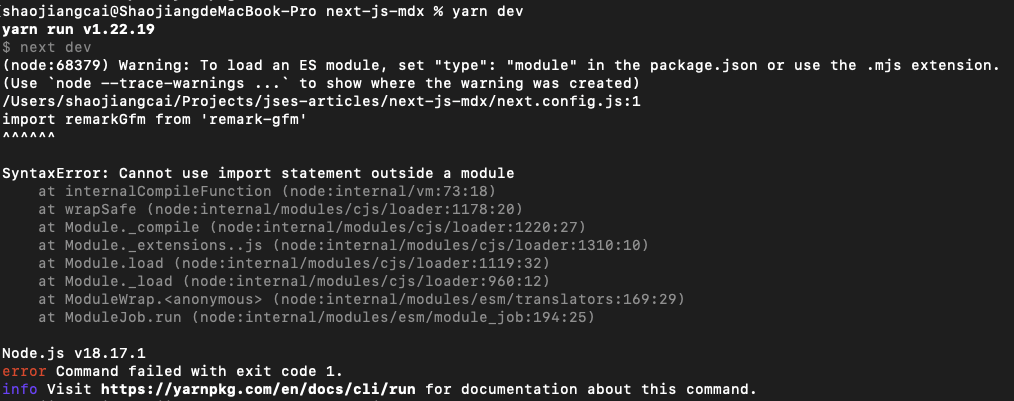
We can now optionally add plugins to make the rendering more convenient. For example, remark-gfm supports GFM (autolink literals, footnotes, strikethrough, tables, tasklists). Since the remark and rehype ecosystem is ESM only, you'll need to use next.config.mjs as the configuration file. Please remember to change the file suffix from .js to .mjs. Otherwise, the app cannot be started:
Content of next.config.mjs becomes:
With the plugin enabled, the renderer supports features like hyperlinks automatically. For example, https://jses.io will be rendered as <a href="https://jses.io">https://jses.io</a>.
10. Conclusion
We have now enabled the Markdown/MDX rendering on in a Next.js app. Please checkout the Demo Repo and play with it.